

FileMaker Project Management Template
Welcome back to the third and final part of our FileMaker project management blog series. We reviewed the various types of project management solutions and established a basic set of requirements and the beginnings of an ERD for the system in part one. Then we brainstormed the workflow for our system and used a few whiteboards to make preliminary sketches of how the solution will work. Finally, we will build the application and flesh out a FileMaker project management template.
Now, we’ll dive into some actual coding in FileMaker. But first, we should name the solution. The name might sound trivial, but most app designers and software CEOs would agree that what you call the application and how you brand it does impact the product’s success. Also, as FileMaker developers, we have come across many solutions called “The FileMaker,” which is like calling all Excel sheets “the Excel file.” We encourage all of our clients to distinctly identify each program. For this particular project, since our graphic design firm focuses mainly on pet food clients, we will call our system WoofWorkSpace, or WWS for short.
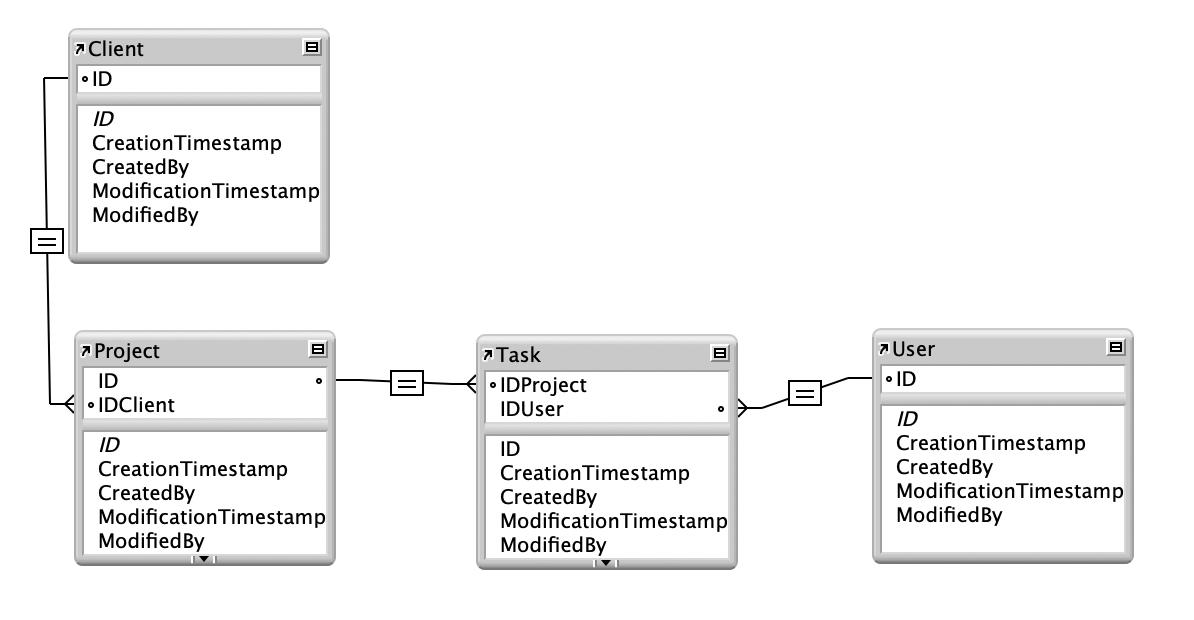
Of course, we must create the file as well as the primary and foreign keys, and replicate our entity relationship diagram (ERD) in the relationship space. The first pass would look like this:
Next, we start building out our list of fields. When working with our clients, we’d reference our initial discovery documents for that. But, for the sake of this example, we’re keeping the details simple and building from there. For instance, there are many fields that we could include in the client database, but we’ll focus on the fundamental parameters. Here are screenshots of the basics so far.
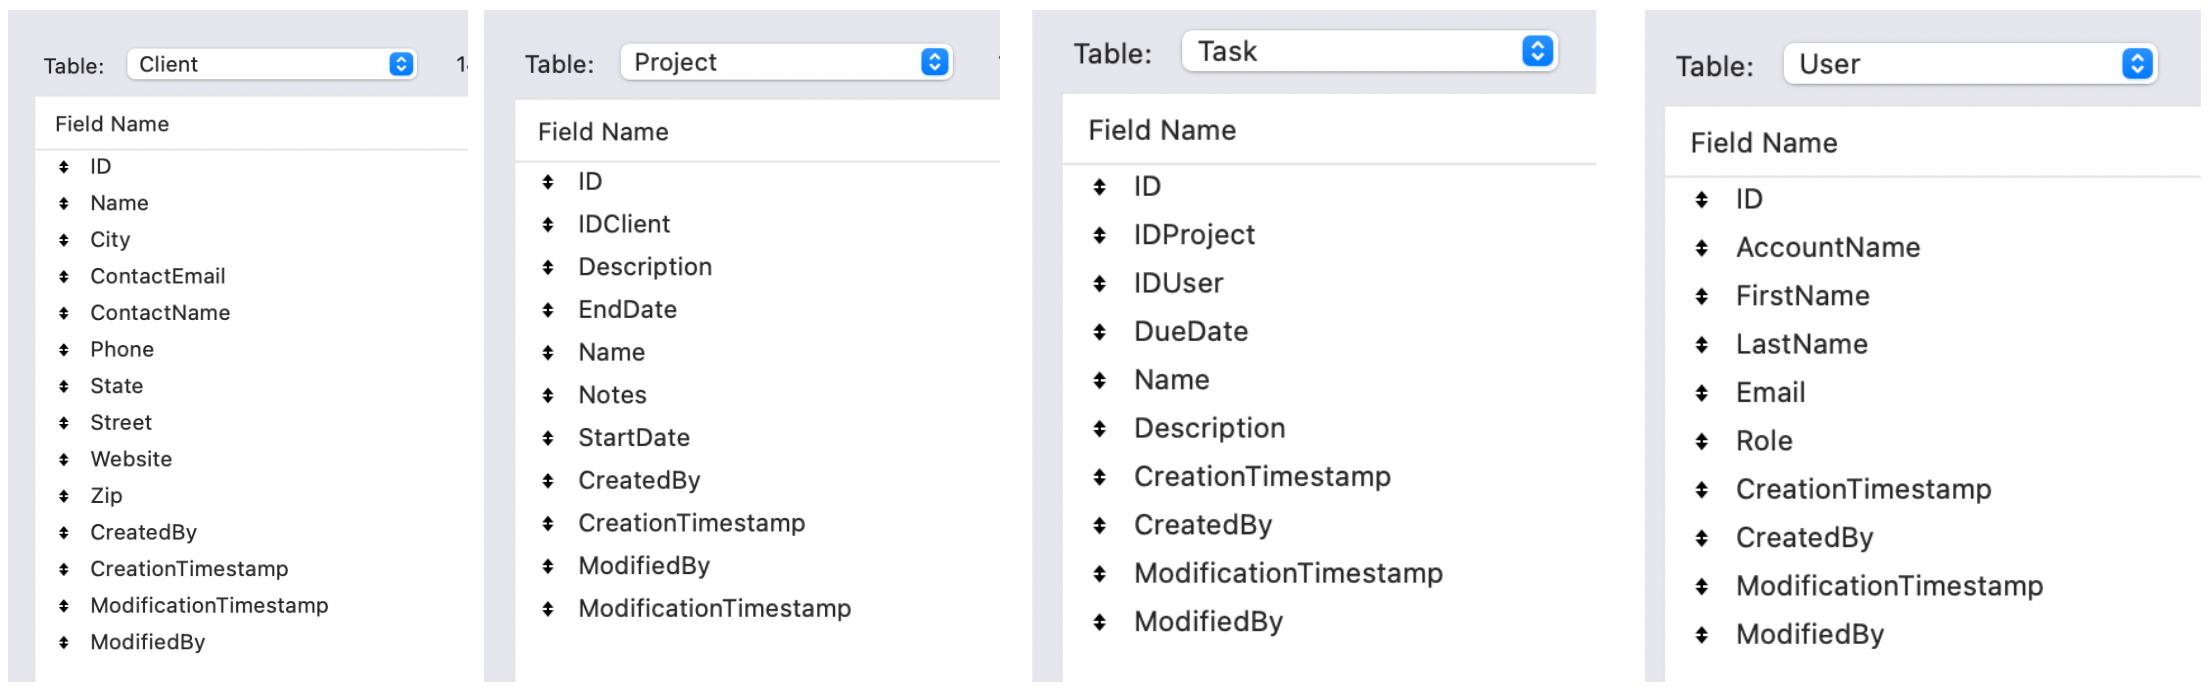
Please note that the above screenshots are snapshots in time of our development – a good starting place for us to start working on the next steps of this project. The list of fields will evolve as we continue to work on this. You will find the ultimate list of fields we used for this application within the FileMaker project management sample file.
So with that said, our next step is to work on the user interface (UI). Based on our FileMaker project tracking software article, we already have a good sense of the app’s functionality. So, going into layout mode, the first thing we do is set the grid to 64/8. We’ve found that using this type of grid makes our UI design attractive, not to mention easy and fast to implement.
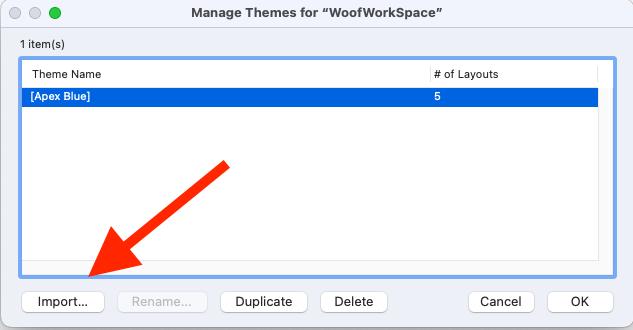
Next, we want to start designing the layout but don’t want to start from scratch. We’re going to use the Apex Blue theme to keep things simple. If you read our blog post about designing a CRM in FileMaker, you might recall that we also used the Apex Blue theme for that project. But we modified it a bit to work with the 64/8 grid. We will import that custom theme into this new project to save some time. To do that, go to File → Manage → Themes, and click on the “Import” button at the bottom of the dialog box.
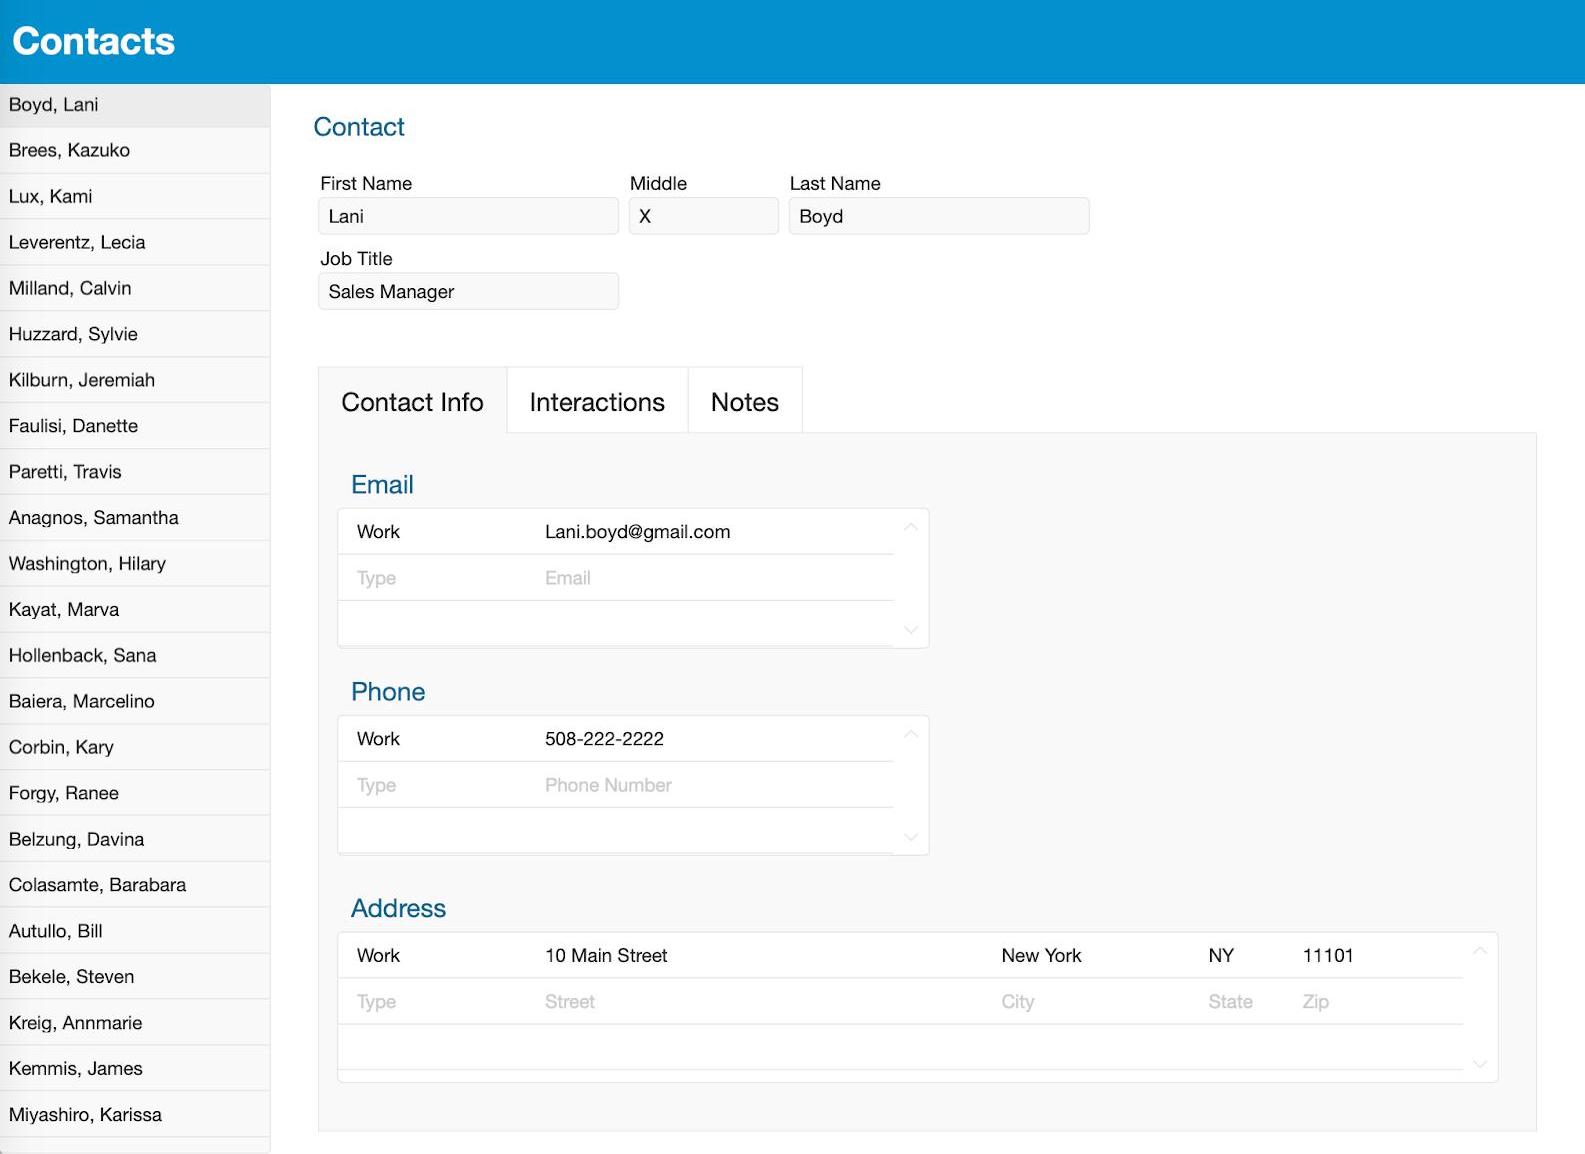
We will also copy the old detail layout we created for the CRM solution into the new WoofWorkSpace file. Luckily, it has a similar structure in terms of design, so we should be able to adjust it to fit the new solution easily. Here’s what the CRM layout looks like.
We decided to use tabs instead of the side navigation element for the project management layout mainly because those are easier to implement natively in FileMaker, and again, we’re aiming for simplicity here. However, if we had time, we would spiff up the side navigation and implement a Material Design look and feel.
Here’s the first pass of the new Project Detail page. We have four tabs: Tasks, Team, Documents, and Notes.
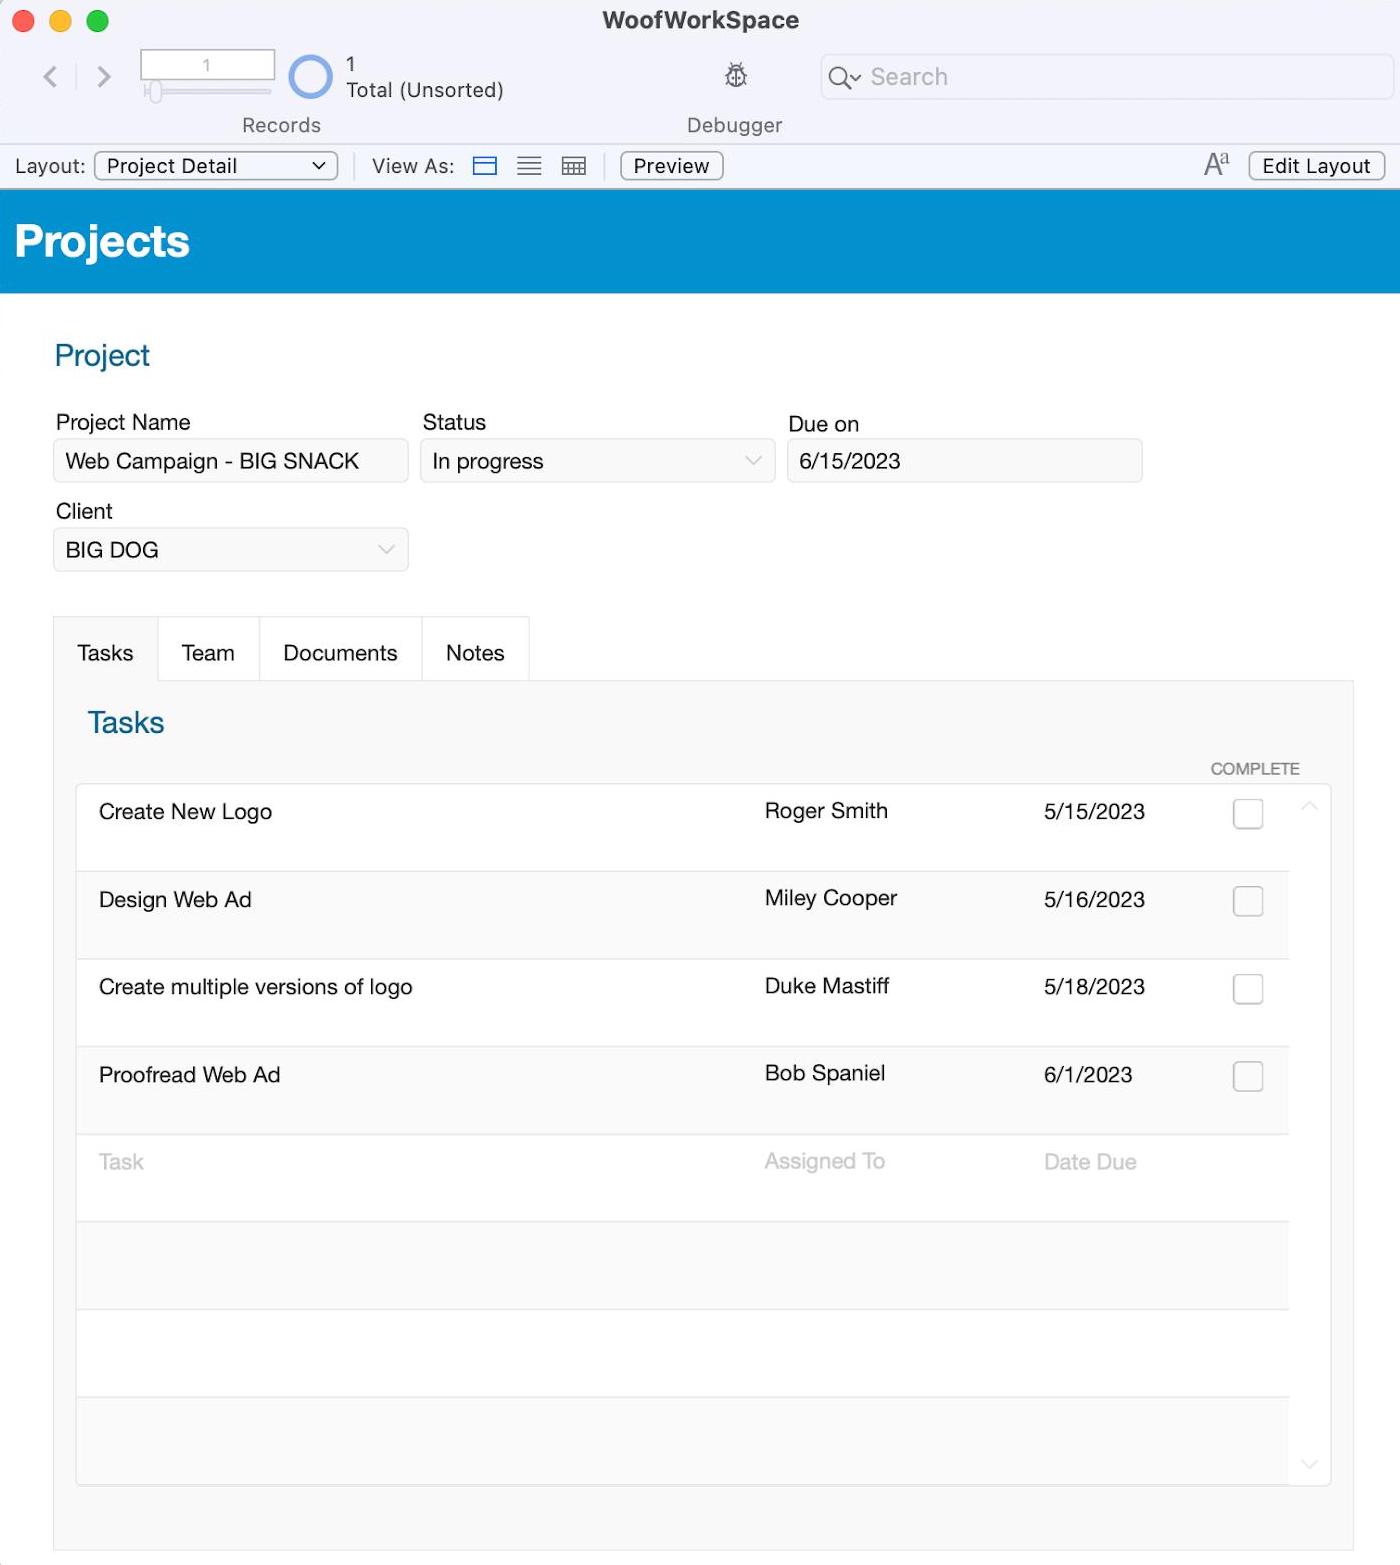
We can delegate as many tasks as we like and assign each task to a team member. There are drop-down menus for the “Assigned To” field that only allows us to appoint a team member to a job.
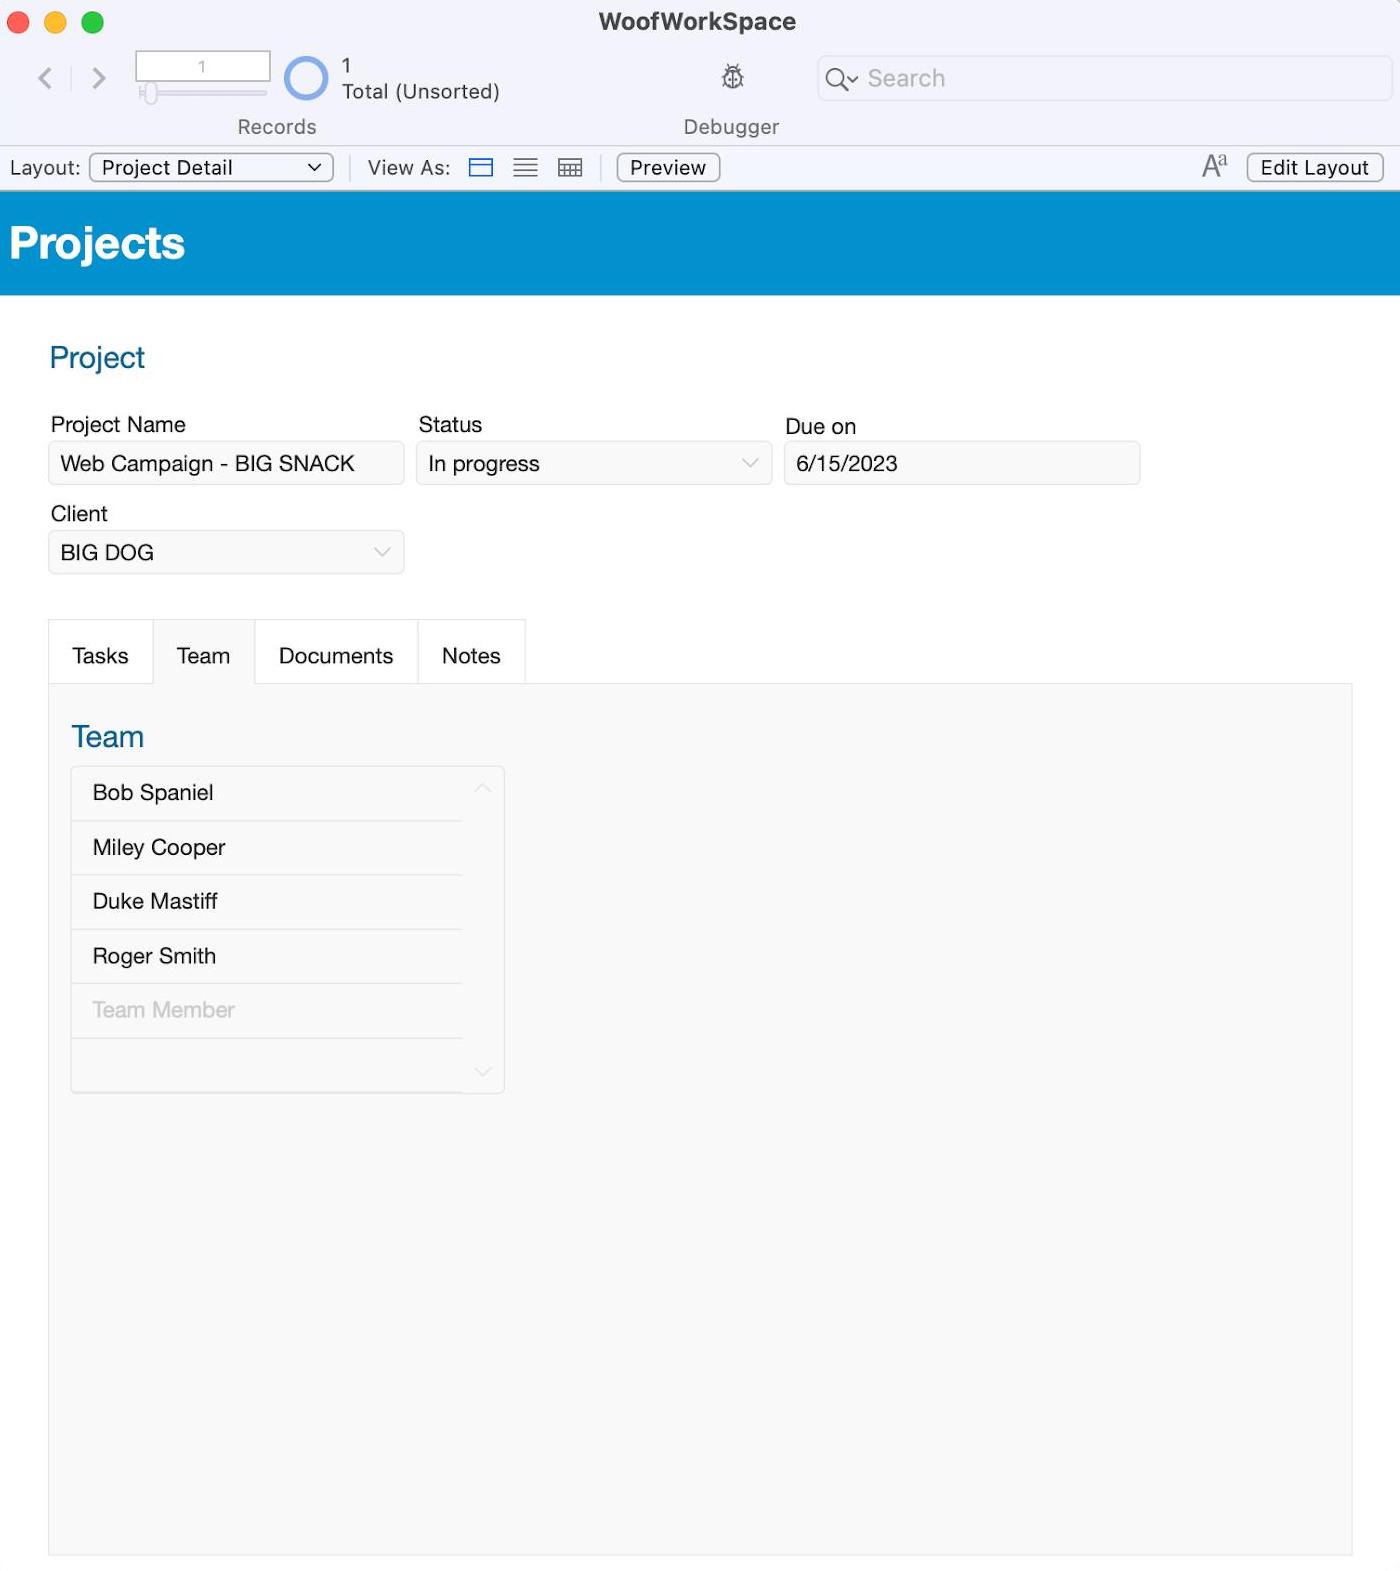
Next to the tasks tab, we have tabs for Team, Documents, and Notes. You can select which users are part of this project’s “Team” within the Team tab. If selected, they will appear in the drop-down to be assigned tasks.
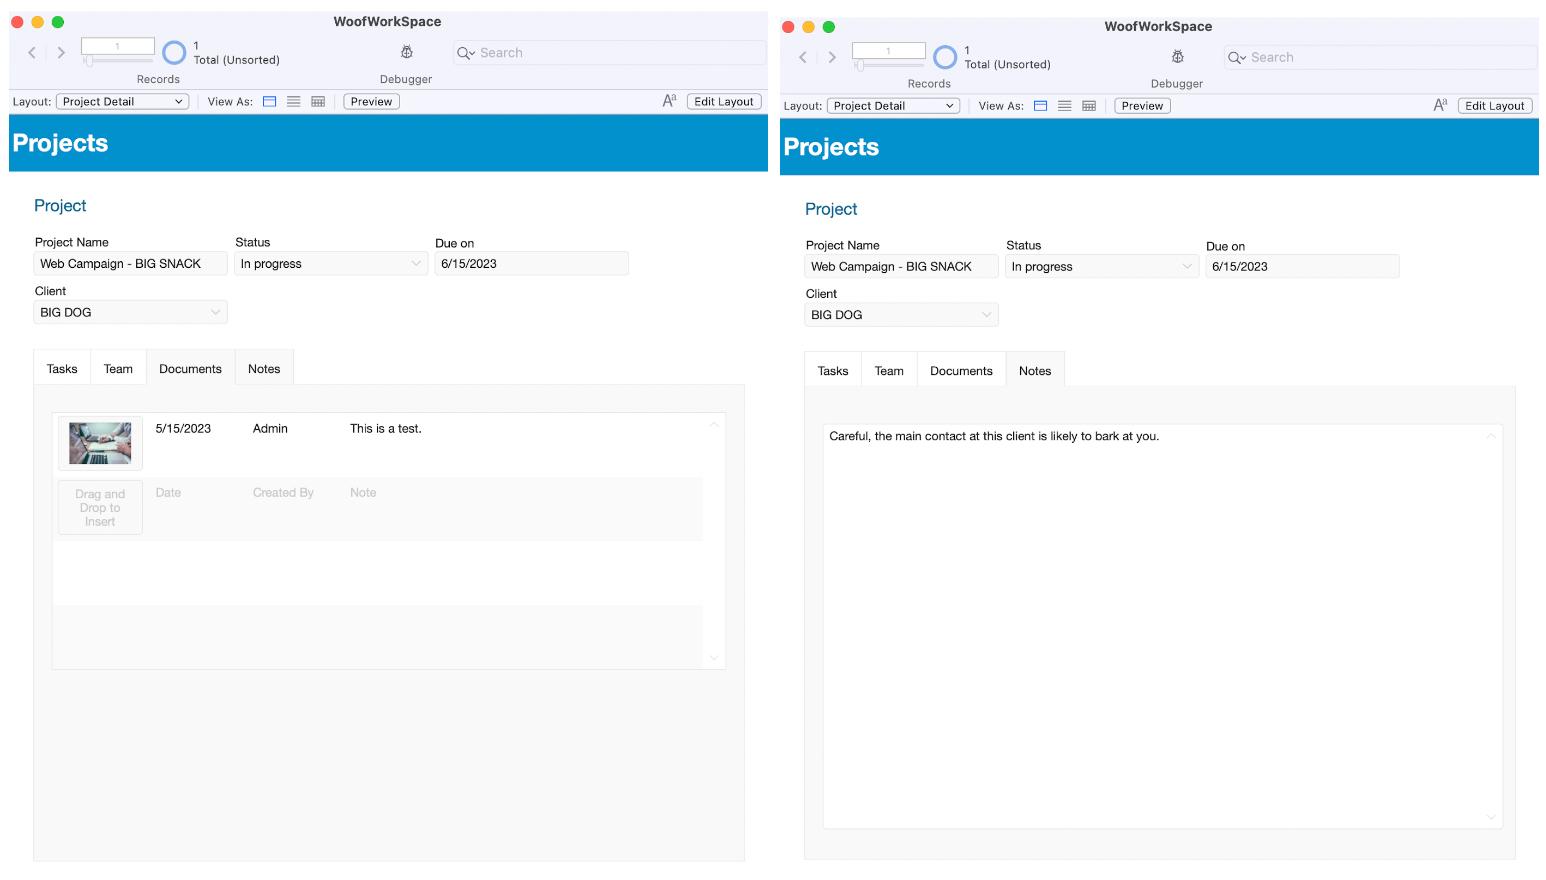
Documents is a place to store PDFs of specs, text documents, and images to be used in the web campaign.
And that’s the heart of a Project Management system. From here, we would flesh this out by adding the following:
- A task detail card where users can add comments and feedback, with screenshots, for each task
- A list view for tasks so users to see just their tasks
- A dashboard showing users their assigned tasks, projects, and clients
- A clients module to display the client’s demographic information, and the projects associated with that client
- Color coding and visual alerts to indicate when tasks are due or overdue
- Email alerts to further highlight when tasks are due or overdue
- A settings area with fields to add users quickly, and email address settings for sending email notifications
Nonetheless, this FileMaker project management template adequately demonstrates how quickly and easily we can implement a low-code solution to address a task management problem. By being able to change the application’s structure so easily, stakeholders and solution developers can create project management solutions that are tailored specifically to their workflows and business operations.
Discover other ways FileMaker improves productivity and operational efficiency. And find additional custom app development resources, including tips and tricks, demos, and best practices.