

How To Manage and Customize Images in FileMaker
Image features are pretty common within FileMaker apps. We’ve had the ability to store images and other types of files in container fields for quite a while. Usually, we leverage that capability to build image modules for our clients. Having developed several of these myself, I can tell you that users generally want to be able to do at least three things:
- Save the images in FileMaker
- View a thumbnail of the image
- Customize the size of the image
Of course, there are different ways to accomplish these requirements efficiently.
Oftentimes developers will build the functionality to enlarge an image into FileMaker itself. Basically, they’ll create a separate layout or a popover where the container field takes up the entire screen. The problem with this technique is that FileMaker’s native features don’t have a lot of control or flexibility as far as how that image is displayed. Users can’t zoom, resize or rotate the image and saving it can be cumbersome. Plus, there’s the overhead of creating another layout and writing the script to navigate to and from that layout within the app.
We have a simple solution that will allow users to manage and customize images in FileMaker. Hard to believe it’s a script with just two script steps. The basic idea is to export the image to FileMaker’s temporary folder and then open it with the system’s default image viewing program. Let’s walk through this a little. Here’s what a medium-sized thumbnail looks like in one of our solutions:
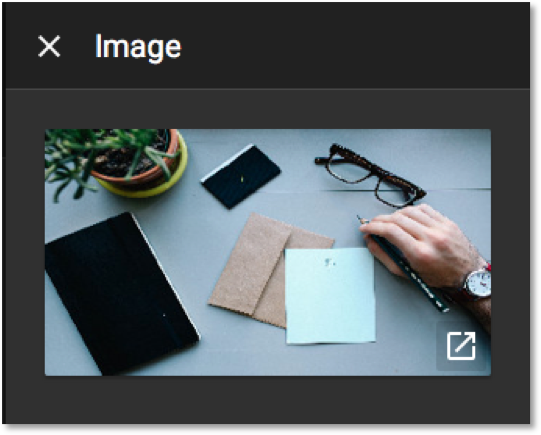
We’ve overlaid an icon on top of the container field at the bottom right. Clicking that icon will run the following script:

The first step is to set a variable that we’ll use to specify where the image will be exported and what its filename will be when it’s saved. The location is set by the FileMaker function Get ( TemporaryPath ), which will return the temporary path of the FileMaker application for the workstation you’re using. We use the GetContainerAttribute function to find the original name of the image that is stored and use that as the filename just to keep things consistent.
Where: Get ( TemporaryPath )
What: GetContainerAttribute ( image::file ; “fileName” )
The second step is to export the field contents of the container field to the file path you specified in the variable above.
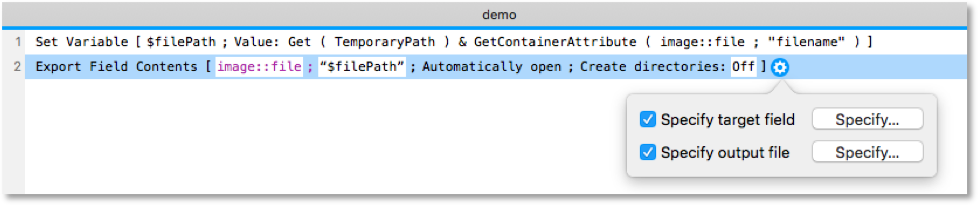
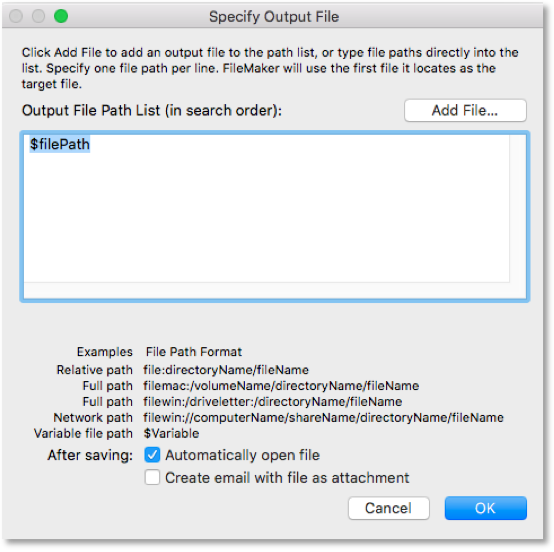
For the “Specify target field option,” select the container field you want to export. For “Specify output file,” fill in the variable you created in step one. And then here’s the piece that makes all of this work, make sure you check the “Automatically open file” checkbox before you click “OK” in the Specify Output File dialog box.
That’s it! This script will export the image into the Temporary folder on the user’s computer and open it up in the specified default image viewer.
We hope you find this tip helpful. I can’t take credit for this technique. Matt Stanford, a TSG developer, actually devised this gem. He’s a FileMaker tips and tricks master. He’s also the brains behind the Material Design blog post.
Find more development tips, including how to move data from repeating fields.